
Last week I humbly offered up a totally unprofessional, possibly misinformed guide to taking bird photos that aren’t completely embarrassing, and that might even make you proud on occasion. Those suggestions were for birders like me, who are not all about taking that one perfect photo. Our focus is on seeing as many birds as possible on a given outing. But why not get some nice pictures while you are seeing them?
I promised you that this week I would give some tips for processing your photos. When your patience and level of photographic expertise aren’t that high, you really need to know how to touch up the results. (I am not talking about photoshopping here, although I did recently learn how to remove distractions such as phone wires or construction cranes from landscape and cityscape shots. Here, I’m only discussing how to highlight what you really did see.) Sometimes post-processing can only make an unusable photo useful enough for achieving a reliable ID. Other times you can take a decent photo and make it surprisingly great.
Before launching into my slacker’s tips, I should clarify that my process begins with sifting through all the day’s photos to find the 10% that are short-term keepers, and that I use Canon’s Digital Photo Professional program for my photo processing, since my camera is a Canon. No doubt other digital brands come with equivalent software. So, having covered those two points, here we go:
- Trim! A Facebook group was recently formed here in Mexico, called ¿Cuál es esta ave? (What bird is this?). I have been amazed, however, by how many of the pictures posted there should be named “Where is the bird?” (Think “Where’s Waldo”, but with feathers.) Definitely learn to trim your photos, to where the bird or birds take center stage, and look large enough to show details.
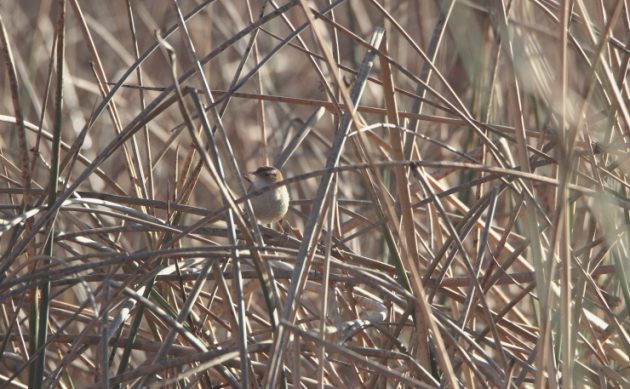
Now you don’t see it…
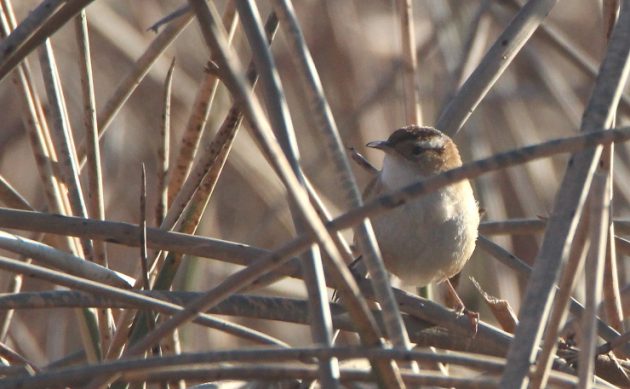
And now you do. (Marsh Wren)
- Don’t forget context. Sometimes you will manage to photograph a bird from so close, with such detail, or the bird itself is so spectacular, that it can fill the entire frame. But usually, showing the habitat is a good thing. It makes the photo say more than just “Look at this bird!” Habitat makes your photo a valuable nature study, and can also add depth and beauty.
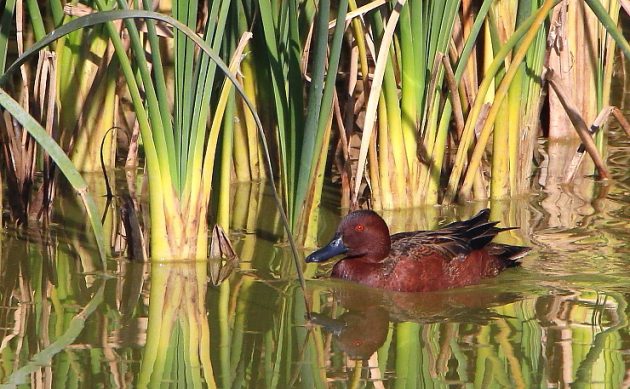
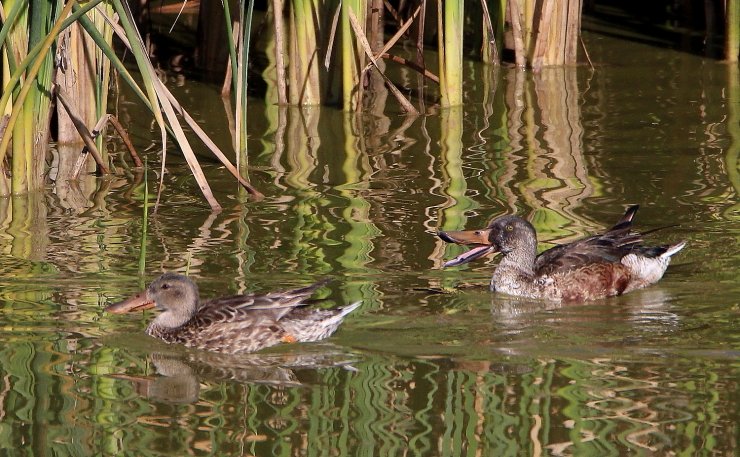
I was so happy do get such a good image of this beautiful male Cinnamon Teal. But the reeds and reflective water make the photo that much better.
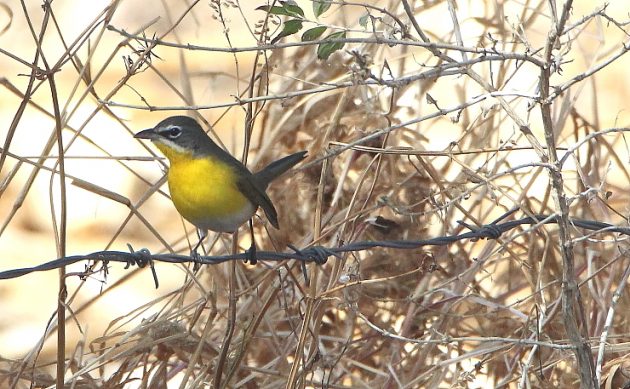
Yellow-breasted Chats love brushy places.
- Stay (un)centered. The photos I have held onto over the years can be divided chronologically into two groups. I know exactly which ones were taken during my first period, without checking out their dates. They each feature a perfectly centered bird. But somewhere along the way, I learned that birds are best featured off-center. Follow the “rule of thirds”: Draw two imaginary vertical lines dividing your trimmed photo into three equal parts, do the same horizontally, and place the outlines of said photo so the point of greatest interest occurs at the junction of two of these lines. For photos of birds, that point will often be the eye, although you could place any other important detail at this point when needed.
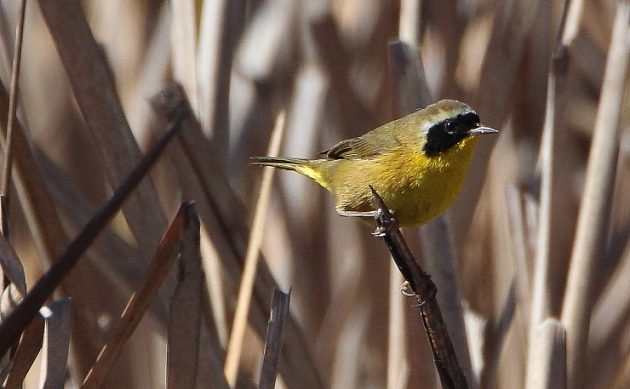
Off-center is more interesting. (Common Yellowthroat)
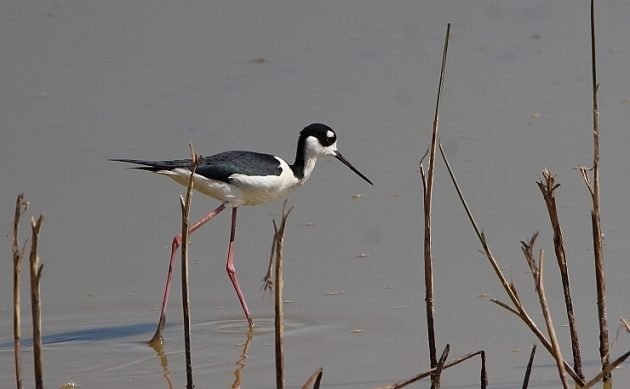
In the case of this Black-necked Stilt, those pink legs, not the eyes, are the main point of interest.
- Keep on the sunny side: I imagine more committed photographers know how to handle light levels better in the field, but I almost never manage to get them just right on my bird photos. As I mentioned last week, birds almost always appear darker than their background (sky or water), or lighter (dense brush or shadows). And the camera will usually adjust the light it lets in to the background levels, not the bird. So learning to brighten or darken your image in post-processing is key to getting a pleasing and highly-usable photo.
This original backlit photo of a Grasshopper Sparrow came out much too dark.

But I managed to fix much of the problem at home.
- Point of contrast: I find most of my photos can be improved by increasing the contrast a bit. Whenever I must increase a shot’s brightness significantly, it will look rather washed-out unless I up the contrast a good deal. (I did this on the above image.) However, an image that shows very harsh shadows and bright areas can often be rescued by lowering the contrast digitally.
- Sharper image: I rarely take a photo that can’t be improved by sharpening the image some. Perhaps if I used a tripod and a remote control, to eliminate all shake, this wouldn’t be necessary. But, slacker that I am, I don’t use those, so sharpening is helpful. Just be sure not to overdo the sharpening, or your photo will look unnatural. (Guilty as charged.) Also, photos taken with very low light tend to look grainy; and the more you sharpen, the grainier they look. A final note on this subject: If you want to share a photo in a format that only allows a small number of pixels (WhatsApp, or the 10,000 Birds platform), you will need to sharpen your image beyond what would look natural in a more expansive format.
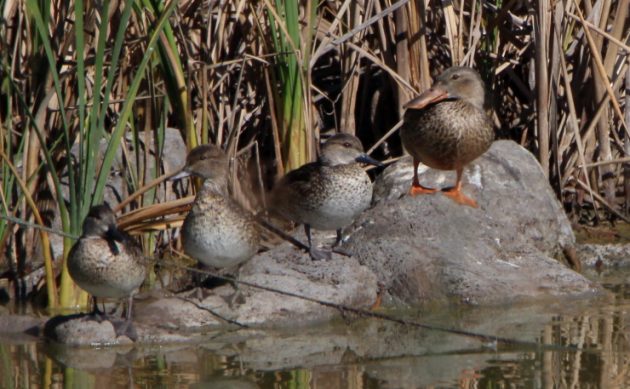
This unsharpened image looks particularly fuzzy in this format. (Northern Pintails and one Northern Shoveler)
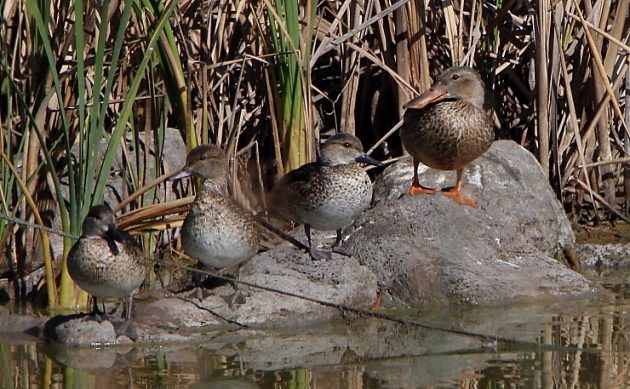
A little sharpening makes a big difference.
Applying all of these recommendations may sound daunting. But I find that, for the most part, they are just ways to spend more fun time with my beloved birds and their photos. The most tedious part, for me, is sifting through all the hundreds of photos I take on any given day. (That’s the downside of using the continuous-shoot mode.) But that process almost always results in some ID surprises, and that hope keeps me going. And watching your photos blossom with a little TLC definitely makes post-processing more enjoyable.
Once again, please feel free to comment or correct any of my recommendations. I am no expert, and I love to keep learning!
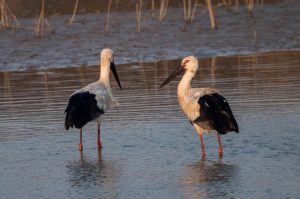
All photos used were taken on or near Lake Cuitzeo on the 11th of January, 2021.


One more slacker’s tip for you: yes, place the bird off-center but allow for space “to fly away”. Having the empty space in front of the bird makes it feel more real (and less boxed in)
In general, I think that is very effective, Peter. Also, if the bird is looking into space, that give it some space to look into. (Although most of my photos on this post happen to break this rule.)